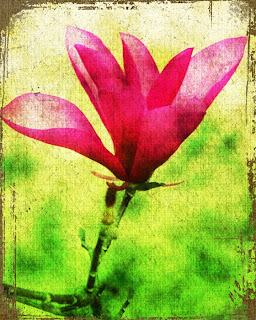
Overlay Art!

Overlay Art!
1. Choose two colors to make a gradient. Fill the whole page with the gradient.
2. Use a Distort> Waves Filter so the colors in the gradient don't blend perfectly straight. They sort of bleed into each other more naturally this way.
3. Create a new layer, hit “D” so you revert back to your default colors. Then in the filter menu go to Render, Clouds.
4. Take your rectangular marquee tool and make a middle selection from your cloud layer. Ctrl J to move to it’s own layer. Ctrl T to stretch to fit your image. Change blend mode to “Overlay”.
Hide or delete the original cloud layer.
5. Create a new Pattern Fill layer and select "Washed Watercolor Paper" (available in the "Artist Surfaces" group from the small arrow's drop-down menu). Then change the Blending Mode to "Overlay" and reduce opacity to about 50%.
After you click on the pattern thumbnail, select the small circle with the triangle and this will bring you to load. Select Artist Surfaces, you will find Washed Watercolor in that group.
6. Bring in the overlay of your choice. I have provided one called. (you can download kimi's golden burlap here ) Change blend mode to “Overlay”
7. Highlight your background image again. Drag your photo into your document, it should fall above your background layer. You may want to try more than one image. Remember you can go back and play with the opacity of your Overlay layers.
8. Now you can leave your image in normal mode are play with your blend modes to see what kind of kreation you can make. (highlight your image layer, highlight normal in your blend modes, use your down arrow key to scroll thru the different blend modes) Cool huh?
I would love some feedback on this one!! Do let me know if you give it a try? Check out some of the images posted using this technique at kimi's Kreative homework #16
Or dig around some of the really cool info located at the Photoshop Creative Elements Community.
The flower image was pulled into the same file as the picture of Holly. It's blend mode was changed to multiply and the image of Holly was left on normal. You can not add an image, just play with the opacity on your layers until you like the effect and use the tut for a scrap paper.
It is all about... making it your own!
hugs..
~kimi~

Comments